jon has taken a basic 900 seca and turned it into something very special and you can read all about his story at the link below.

These pages were originally started as a way for friends and family to track the progress of a long awaited restoration of my trusty old Yamaha XJ900 F, which had lain under wraps for a decade while my wife and I tried to work out where all these children were appearing from!
That having been done the bike was carefully unwrapped and this is as close to the rebuild story as I can manage.
The responses I have received to the pages however come from far and wide, the Internet being what it is and so I have decided on this addition to the pages, which have been pretty much hidden until now, where I will place a couple of links that I have received to pages where I have been privalaged enough to be linked from!.
The first of these is to the Web Log of Jeroen
Nieuwegein who lives, works and plays in the Netherlands and purchased an XJ900 to commute to work with. This was way back in 2005 and, I have just visited the latest update to his page today and see, with slight feeleings of dismay, that Jeroen has decided to replace the XJ with a BMW. However, since Jeroen uses his machine on a daily basis through all sorts of weather then I have no place to comment :)
Jeroen Nieuwegein's pages can be accessed by clicking on the picture of his XJ900
Update. It appears, and may have been for some time, that Jeroen's pages are no longer available. Apologies for that
The second link here is to the restoration page of Jon Fife who contacted me very recently, having just stumbled across my humble pages. This link is to his restoration of a U.S. model XJ900 which is called Seca in the States but, as far as I can tell, is very similar to my own model.
jon has taken a basic 900 seca and turned it into something very special and you can read all about his story at the link below.
Finally, Click on the following link for an XJ900F Specifications and Description page
And now, for my own pages. I do hope that you enjoy these and can learn something from them as others seem to have. I am delighted to hear from anyone who enjoys these and also anyone who is currently running and maintaining an XJ of any flavour or indeed any like minded biker. The more we help each other the less we get ripped off is what I say :)
Out of the Ashes
Grow the stirrings of a Motorcycle!
So, in 1995, following just three and a half years on the road I finally had to shelve the trusty XJ900. Thing was, I had used it to travel up and down from Redlands Ambulance training college and, on the final morning the battery was flat and the front tyre had gone flat due to the corrosion of the rims. I limped home, used the XJ for a couple of trips to Kinlochbervie on relief Ambulance work,before getting fed up with the leaky tyres.
I removed the wheels at an opertune moment and got Dorells brother to take them to a metal finishers in Edinburgh to be shot blasted and powder coated. That was the last thing that happened apart from some half hearted stripping of the brake components which I now regret! So, the bike was left in a friends garage for what amounted to over 6 years and finally, in my Garage for three and now looks like this!:

Not so bad really given the time lapse but, bad enough! So...The rebuild began around the time Douglas purchased his CBX750.
First moves
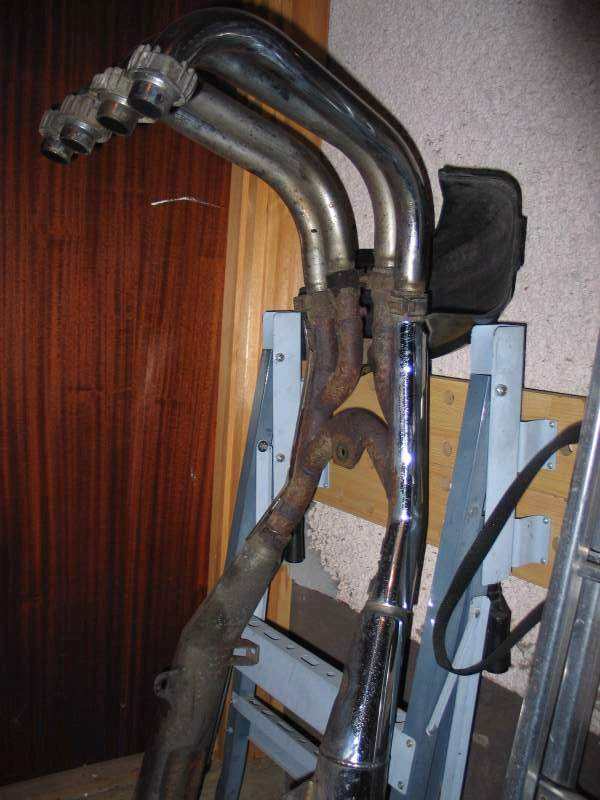
Take some stuff off! Exhaust first!
 And then?
Put some stuff back on? Perhaps I need wheels? Yes wheels are good so I can roll the thing aroung and get access to both sides. So, wheels need bearings, discs and

....Hmmm Tyres!.
I Found someone breaking an XJ on Ebay and contacted him about all my missing wheel gubbins such as discs, bearings, speedometer driveplate, spacers etc etc. A special mention must be made of Paul Cheffings who's attention to detail and eagerness to help has been inspiring, so thanks Paul, it was a lucky break finding your brief advert on Ebay and, perhaps you've not heard the last of me yet !! :)
All this stuff definately came back from Edinburgh (apart from the Discs) but we can't find them so....£75 later and the wheels are nearly ready to put back on the bike, just waiting for the discs to dry

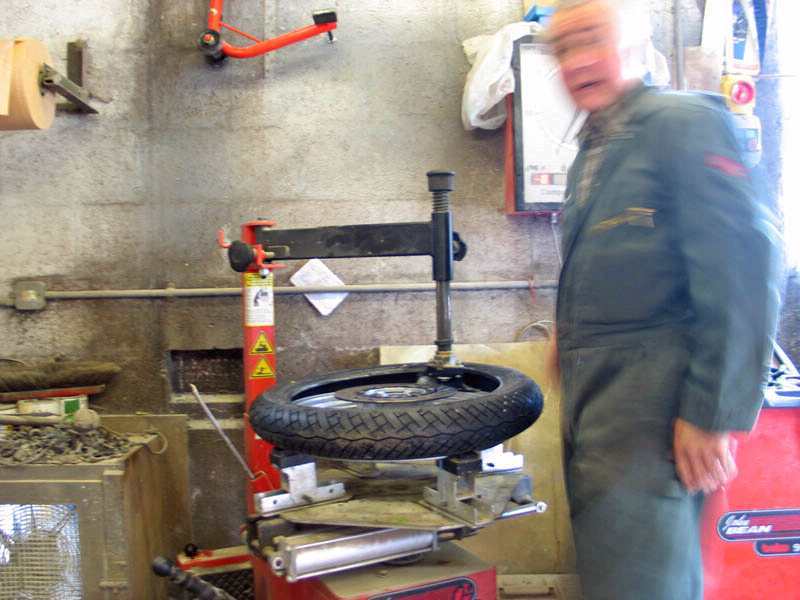
So I fired the wheels back together and contacted Spinningdale Motors Originally I sent an E.Mail to Tom, who I think owns the Garage at Spinningdale, but his E.Mail address is not working at that time so, if you intend to contact him, and I would recommend you do, then use the telephone or FAX numbers provided at the site for the moment. Anyway, I contacted him to get prices for a couple of tyres and he managed to undercut my usual supplier, Black Circles by a few pounds for a set of Bridgestone Battlax tyres, and of course that was fitted and balanced into the price so a great service and gold stars to Spinningdale Motors there. My brother booked the CBX in for an MOT also and we set off on Monday 9th June 2006:
 |
| The Assynt Locals will tell you that this is taken on the way home from Spinningdale but...I lost the rest of the pics of the journey! |
The Tyres go on the wheels
 |
 |
 |
| The CBX lies in a sea of bikes waiting for it's MOT | My naked wheels lie waiting for their "shoes" | Here we go (The eagle eyed among you will have spotted the other XJ back wheel in the picture) |
 |
 |
 |
| "What are you doing?" Tom adds privacy blur to his own face | A little Balancing act | The back wheel is complete! (There's that other wheel again, wonder if I could just sneak it out?) |
And off we go home again
Hold on? That Metro is overtaking Douglas now!! Should have got a Yamaha Tee Hee

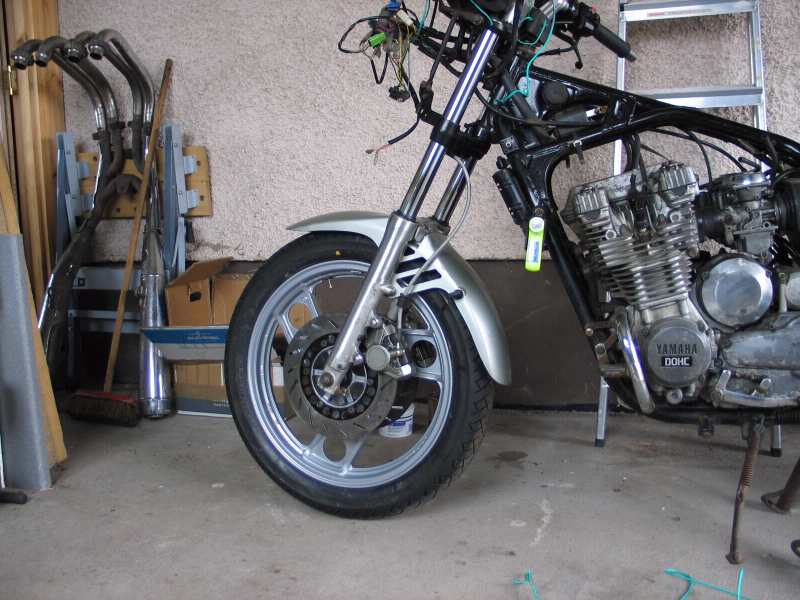
| So home we came a few £'s lighter but with a major hurdle out of the way, tyres for me and an MOT for Douglas. I spent a wee while in the garage the next day, cleaning up the rear shocks and painting the back half of the frame quickly with a brush and smooth black Hammerite | Then I fitted the wheels with their tyres to the bike and stood back to admire my work. It's starting to look like a bike again! for the first time in over 10 years I was able to roll it off the stand and push it around the garage....making quiet brrrum Brrrrrummm noises :)) b |
 | |
| Here we are then, the current state of play. Amazing | |
 |
June 13th 2006
First setback
Spent the day in my Garage moving things forward. Working at the back end I started to fit the braking system, master cyl, claiper and brake torque arm. Up until now everything has just been fitted loosely and so it was time to tighten things up to the specified torque...very responsible of me! But, as I tightened the rear wheel axle up...somethings not right, the wheel is not turning freely. By the time I get to the 105 Nm required the wheel is locked solid. A big sigh!
I guess that I must have put the bearings in wrong but doubt it since Paul Cheffings had packed things in exactly the order they came out of his wheels (Told you he was good) and locked them on plastic "zip" strips. Anyhow, I had to have a look so...a fair proportion of the evening was wasted by removing, checking, replacing the bearings a couple of times to no avail...still locking when tightened.
 |
| Wasting an evening refitting bearings |
Following the third attempt at rearranging bearings, and by now I'm getting good at this, I finally give up and decide to do some deep thinking (Hmmm!) I have a look at the Hynes Manual just in case I've missed something important, after all it's a few years since this machine was taken apart and look what I found!!!
 |
| The cause of my wheel locking up |
It would appear, kind reader, that I have a missing spacer. Let me see now, that would make a total of three spacers and two washers to fit the back wheel succesfully. Problem is, I have no recollection of there ever having been a spacer in the final drive casing but...of course...there must have been. PAUL!! help
On a lighter note
I dug out my ancient metal polishing kit also yeaterday (13th June 2006) which was purchased in 1991 from M & P motorcyclesand had a go at the rear grab rail again, previously attacked in 1991 fairly unsucessfully given the fact that I was working in a cupboard in my then house!.
This time I have had more success as I started with a brass wire brush in my drill! A little radical but then, the Alloy parts are in a bit of a mess. I have no picture of the before grab rail so I will show you the rear footrest hanger instead. The grab rail was worse!!
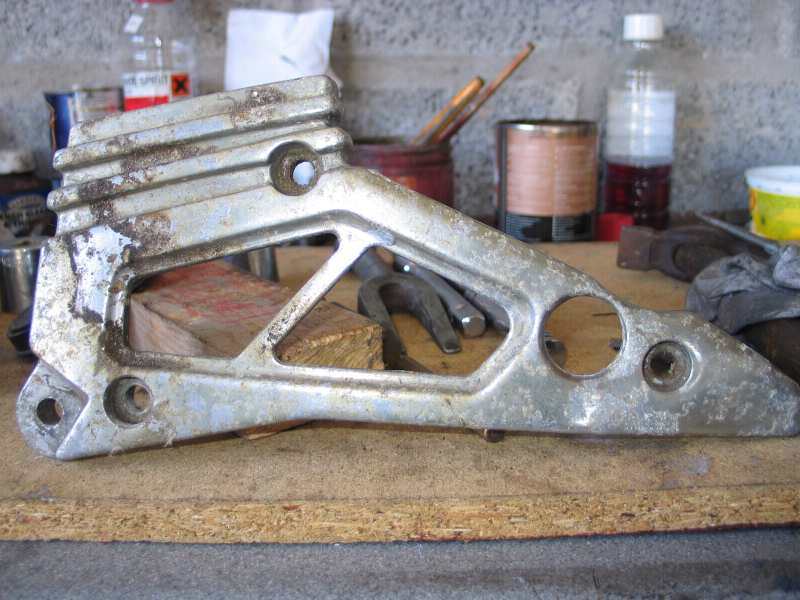 |
| The salt and time do this to metal |
But if you add some elbow grease, a decent polishing kit and a huge amount of time you can achieve this!
 |
| You can see your face in it!! |
Ahh what the heck, have another one...after all, I worked very hard on this, my face was as black as coal when I finished.
 |
| Yeehaaa, you can still see your face in it. and It's not finished yet!! |
June 15th 2006
Douglas get replacement forks
Eeek
This evening brother Doug arrives bearing forks from Ebay. Although we could see early on that they were slightly different we carried on regardless, hoping that this was just because of the Japanese import roots of the bike and that it could be made to fit!!! Couldn't have been more wrong as it happens.
I'm going to cut, what was a very distressing experience for both of us, very short and say, the next time we tackle forks I'll be sure we are both free from any responsibility and have more time available. As it was it was midnight before I got to bed and my garage floor looks like the night of the chainsaw massacre...and the chainsaw lost!!

| 0
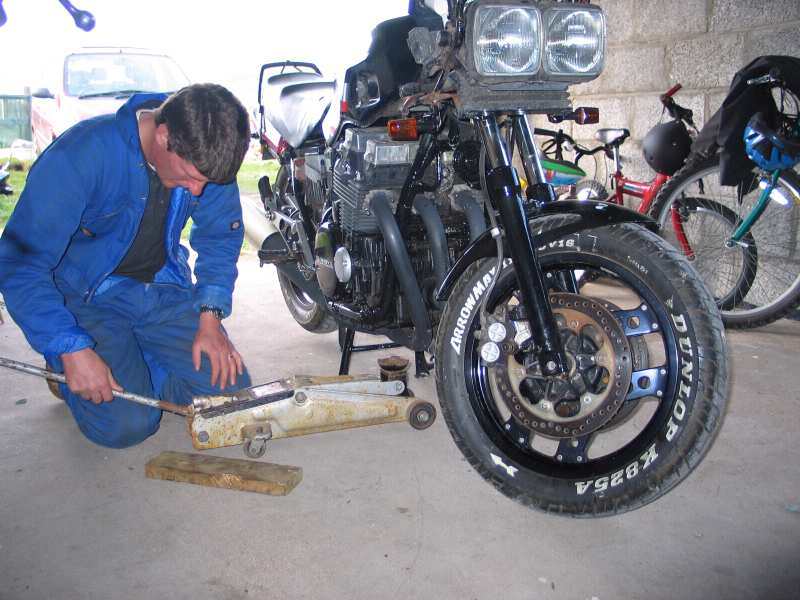
|
| Douglas wheels the CBX in to the garage, everything looks fine so far | Ok, now we take the weight off the front end with Jack |
Things would have been fine if it had been a straight fork swap but no, we had to try and make one good pair of forks out of the two. Pha! Never again. We did get the bike mobile again though and I've not heard from Douglas since!!
Tonight I'm tired...will update todays activities in the morning,
Goodnight
June 16th 2006
A day in the Garage
 |
| The bag on the left is the Missing spacer from Paul and the rest is obvious |
And yesterday the Postman brought me:
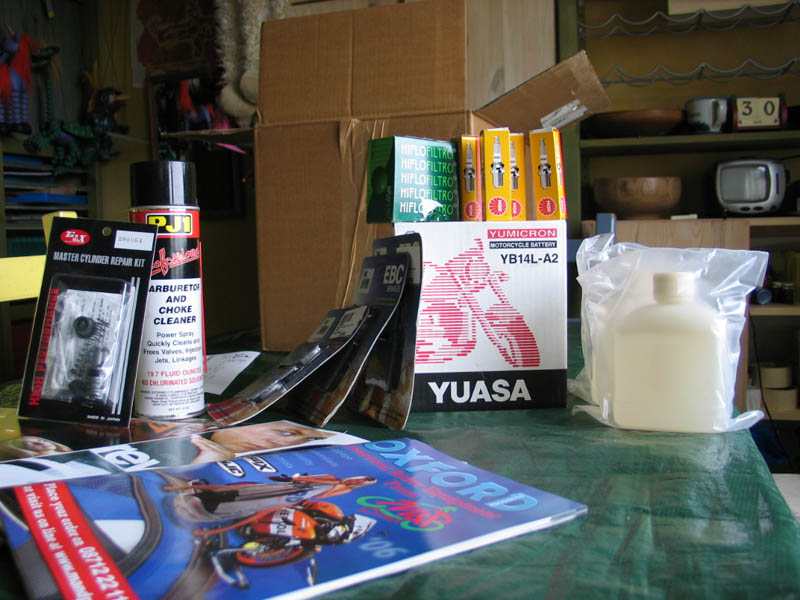 |
| All the rest of my stuff from M and P Motorcycles |
Including a new battery and acid for that, an oil filter, spark plugs, carburettor cleaner, brake pads and a rear masyter cyl repair kit, and so, that's what I did in the Garage yesterday.
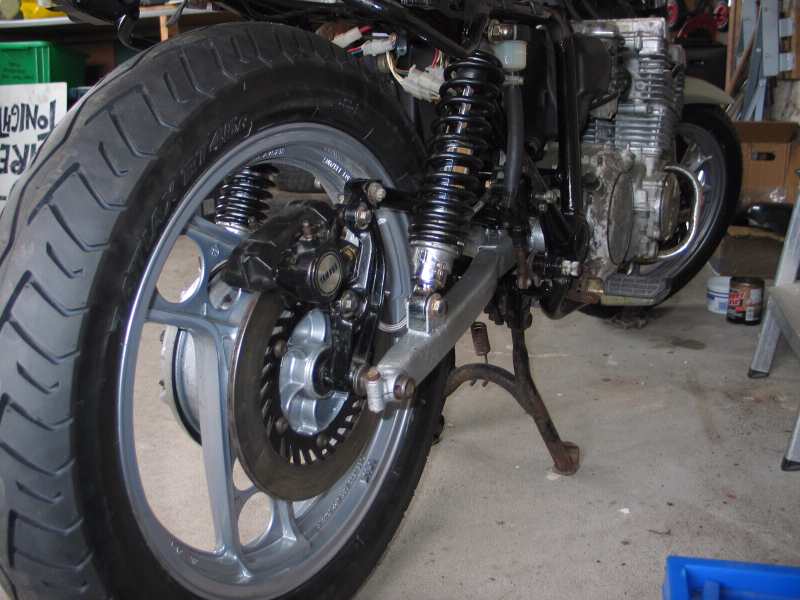
I finally got the back wheel on and spinning while torqued up! (quite important that one) I got the brake calipers all rebuilt and attached to the bike with new pads, I fitted the Stainless steel braided brake hoses from Goodridge and popped in the new oil filter (The oil has been drained for a couple of weeks)I filled the battery with the Acid....that was exciting, a lot of fizzing and bubbling there, and put it on to charge. I also removed a few more bits and pieces that require the services of Hammerite including the side stand and part of the front fairing mounting frame.
 |
| A wee bit of painting |
|
|
| The front, with brakes and a mudguard!! | The back with brakes and a rolling wheel! |
Sunday 18th June
Day one of the weeks holiday
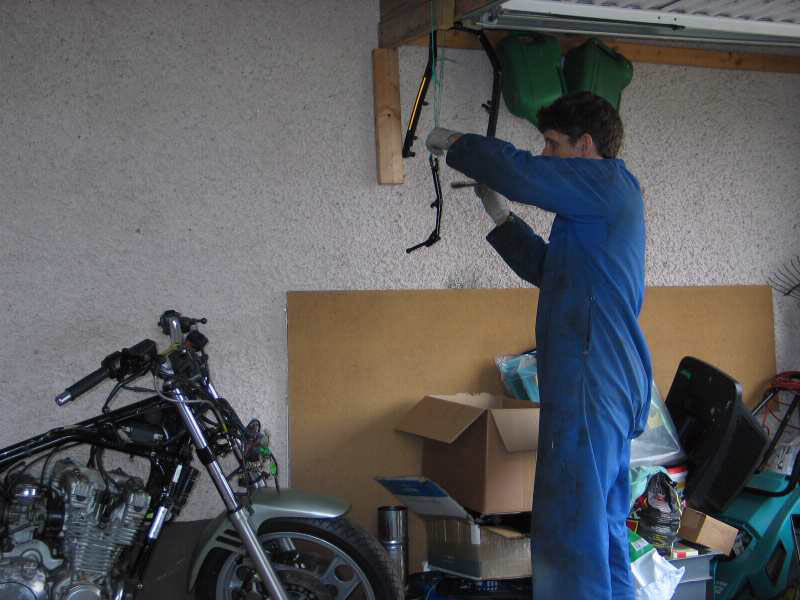
The main achievement today was most definately the cleaning and polishing of the Fork brace. The fork brace, in comparison with, for example, the grab rail or the rear footrest hangers, is relatively small but you should have seen the mess of me when I finished!
 |
| How am I gonna get this off? |
Of course it was all worth it when you look at the finished product but I'm certainly not looking forward to the footrest hangers!!
 |
| Shiny happy thing |
Anyway, that's for another day. The other things I managed yesterday included, filling and bleeding the rear brakes. And it appears to have worked. I left the pedal under pressure for several hours (while I polished said fork brace) and there was only very slight seepage of fluid around the outside piston. I'm happy with that for now and will keep an eye on it once I start using the machine, it's certainly not dangerous. My car turned out to have both rear wheel cylinders leaking badly the last time I did a rear brake service and it was still stopping Ok!
I also tackled one of the final "big" jobs waiting to be done....the carburettors.
Way back then, just before I decided to embark on this rebuild, the first thing I did was get a battery charged and connected and see if the beast ran. After several attempts, recharging batteries in between and using a car battery also...on jump leads, I had still only achieved a few loud bangs and intermittent firing.
I researched old petrol on the Internet, and discovered that people have been known to throw out petrol after as little as six months storage as being "Stale" I of course had no idea this would be a problem and was trying to start my bike on 10 year old petrol...Stale?
So, Mrs Pirie retrieved me some fresh petrol from the garage and, with both batteries attached the beast burst into life. Lovely thought I, but it WAS a little rough. Still, I supposed it had been 10 years and it would take a while to clear it's pipes. However, after 30 ins of ticking over, relatively well, it still would not rev. I open the throttle the engine died. I start it again...it idles well...I snap the throttle open..it dies. "Things that make you go Hmmmmmm" Jets probably need cleaning I thought and left it there.
Yesterday I discovered the problem. Anyone who knows eben the slightest little bit about the Vacuum piston carburettor will wonder, just like I did, how this bike ever started! All four pistons are seized solid in their bores. So solid in fact that I can lift the whole rack of Carburetors using the flat tip of a screwdriver under one of these pistons
 |
| Things that make you go Hmmmm |
I have managed to get them moving just a little now so I'm hopeful that the Carbs can be salvaged. I di hit on a few problems with seized screws as well though. Every home mechanics nightmare as, without the proper equipment, these can be very difficult to remove. In fact, without these tools:>>
 |
| My Impact driver and "Easyouts" |
The impact driver has been getting me out of trouble since 1980 when I had my brief dalliance as a Car mechanic. It's a fine tool for very tight screws or bolts, just to get them started. However, if that fails, and in this case it did on four out of 16 screws, then you have to resort to more inventive methods. IN this case I drilled out the centres of the screws and used my set of "Easyouts"Which worked in three out of four screws. The forth one snapped the head of the screw off but, I was able to find a self tapping screw to drive into the hole left after I drilled out the remaining screw. I didn't enjoy any of that!
 |
| The shiny screws are the replacements |
And just then, it was time to eat...I had to spend a fair bit of time in the shower first though!!!
Now that I have a very good reason for the bike not running too well I'm actually quite pleased. Once these pistons start to slide freely, and for those who don't know, they should slide freely enough to be raised by air pressure when the throttle flaps are opened! (See SU carbs here for a close description of how this should work, although not exactly as these have no damper pot, just springs.) then the bike will run as sweetly as t did the last time I used it. I like it when I find a major and obvious reason for a problem, and especially one that is repairable...like this one.
Today I have a Dentist appointment so will not be in the Garage until after Lunch. That is the reason why I have time to do this in the morning and not, as usual, at night before bed.
So what happens today I hear you asking? Well, I don't know exactly but I suspect I will continue with the Carburettor cleaning and refitting. Also perhaps, if there is time, fill and bleed the front brake also. Assuming both these procedures are successful, then we would be close to having our first test drive! A biker freind has persuaded me that the Clutch will free itself off once I get the bike mobile so I am leaving off stripping it out until I see whether he is right or not. It does seem very stuck!! :(
IN any case I will be able to fit the new battery and start the engine again. Must remember to put oil in! or should I just do the Clutch while the oil is drained??
Vote here, just for fun!?
Right, that's it for this session. I'm off to the Dentist now, wish me luck. Enjoy your day.
June 21st 2006
There are probably some among you who are thinking Oh no, I wonder if he collapsed at the dentist...I hope he's alright!And then again there will be those who don't care but I'm sure you are all wondering what happened to the rebuild?
Well, I didn't need any fillings! and I've been busy with the bike ever since so had no time left to update this page.
However, progress has been made. After my Dentist trip I retired to the Garage to start. I have been finishing off the polishing of the rear grab rail and, using my patented cardboard box spray booth idea, spraying it with several coats of clear laquer. In between times I decided to finish off the front brake also, following on from my success with the rear brake. SO I fitted the last brake line and prepared to bleed.
 |
| Pump it |
Since there are two calipers on this circuit, things are never so easy as the rear one....and they lived up to that.
In the end, after several long minutes of pumping, I gave up and attached a length of pipe (which came with the new battery) to the bleed nipple and.....sucked...while, at the same time....Pumped. This seemed to do the trick and a pressure was obtained. But we were still suffering from "soggy lever" when I finally had to stop that night so, I used eveyones favourite trick, Jeroen uses an Elastic band, I use green string!
Of course, lets not forget the Carbs?. I refitted them after a strip and clean to get those pistons sliding and clear the jets. Couldn't get the "Pilot" jets to move so had to be content with spraying Carb cleaner through them??, of course I cannot report any success until I finally come to start up again so...more on that later.
 |
| Overnight bleeding trick |
I've used this with great success in the past with my old CX500 and a friends BMW R100 and I have no less success this time as , in the morning, I have a brake lever worthy of the Goodridge Hoses.
Before I can start the Beast though, it needs an exhaust so....The next day.
 |
| An Exhausting Job!! |
I'm growing to hate this polishing lark although, I have to say that Chrome is much less messy than Alloy. But exhaust pipes? Too much surface area and to tricky to get to. I'm not going to do the obvious and pull the exhaust into it's component pieces because it's too old and the joints are a bit rusty looking. If I get a season out of it I'll be happy...after all..it's the original Yamaha one and is 16 years old. When it finally gives up I will invest in one of those Jama four into two jobs which are one of the few replacement exhausts left for my bike.
So, once the Pipes were polished to within an inch of my life...I fitted them using new exhaust seals which I found Here on Ebay
SO now the XJ look s like this
 |
| Zoom Zoom Zoom |
The Clutch Poll
And finally, following a massive response to my Clutch Poll above (Now Closed) I have a story to tell on the Clutch. Incidentally, all in all the results were alomost exactly 50%. The casting vote of course had to be the original advice from my Friend and colleague Ken Dornan, and the fact that I really didn't want to have to do it as it would then bring with it a £75.00 bill for a complete Gasket set as I can't get a clutch cover Gasket singly.
Anyway, I decided upon a strategy which went like this.
If you look into the oil filler hole you can see the Clutch pressure plate and the first four clutch plates or so
 |
| I can see stuck plates!! |
So, my plan was as follows. With the bike in top gear and on the center stand I held the clutch lever in with my left hand and tried to pry the stuck plates that I could see apart with a large flat blade screwdriver, taking care not to damage them of course. I wound the plates through a complete revolution and did this a few tmes to loosen as many plates as possible.
 |
| Unseizing a Clutch |
After this I sat astride the bike and pushed it forward in top gear with the clutch in and out and in and out for ages. I was just about to give up and resign myself to stripping it when, with a little jerk, it freed itself up...and a big grin spread over my ugly. People, we now have an operational clutch and learning has taken place.
So now all I needed was to fill up with engine oil and press "Start" I reached for my can of oil and....Excuse me....Bugger! It was old oil from a previous car oil change. I was sorely tempted to put the old oil in but I resisted since the bike had been draining for several weeks and most of the dirty oil would be out. So I went back to polishing and fitting bits of plastic and checking the electrics. I found a blown 10 A fuse which fixed all my missing electrics in one go, Neutral light, Brake lights, clock and, I hope, Tacho. The clock won't retain it's memory though so there is obviously a feed missing somewhere
Finally Mrs Pirie came home with a can of oil and I quickly filled the bike and pressed "Start"
I was going to leave it there but...I won't be so cruel. It started immediately of course but, sadly there seems to be more wrong with the Carburettors than I though as, although it's better, it's a long way from right. At least I hope it's the Carbs and not something more serious.
At first I had petrol pouring out of the overflow pipes and even the Air box!! HELP!!!! I disconnected the Vacuum pipe from the engine (which won't help the running) and ran the engine unti it stopped, on tickover, to empty the Carbs. Then I connected the Vacuum pipe again and problem solved? Well, not overflowing any more, but still as rough as a badgers bum. Can't seem to get quick response from the throttles. Open the throttle wide and the engine stops. Open it slowly and it will rev up now which is better than it was. Methinks I must have missed something and, sadly, today will be spent removing the Crabs once more and seeing if I can find the problem...Yuck, I hate the smell of petrol now.
So that is where you find me today. Back in the Carbs. I will of course report my findings at a later date.
This page is getting a bit unmanageable as a download so....I'm starting a new one
If, by any chance, you find this page interesting or, perhaps, even a little entertaining, then sign up below to receive notification of any updates as and when the happen! Of course there is no guarantee anything will happen :)).
James